There are many options to start working on a Bullet Journal, as you get use to getting organized you’ll pick one of the many notebooks as your favorite. How To Make A DIY Bullet Journal is a post where I share the steps I follow to build up mine, hoping these steps will help you to build up yours too.
You will love how versatile Bullet Journalism can be, making every page and spread on your own, keep it simple and minimalist, or decorate it as much as you decide, any way you choose to work on it, it will look amazing.
How To Make A DIY Bullet Journal
One of the best benefits you can get from your Bullet Journal is as you write down everything you need to do, it will be easier for you to pay attention to the tasks you need to work on to achieve each one of your goals.
When you work on every page to add some doodles, or any kind of decoration, you work to make every page more you, by doing this, you can pay more attention to everything you do and it’s easier to remember.
You help your mind to remember everything you need to do, no more of needing to work hard to remember everything, just take a look to the weekly spread, and voila!! you have your “to do list” right there!
Pick your own Bullet Journal.
 As I have mention before, you don’t need a fancy notebook to start working on your Bullet Journal, any notebook will work fine!
But let’s be honest, when you go to the store to buy your new Bullet Journal or you order it online, as soon as you open it and feel the paper texture in your fingers, you might fall in love with your new notebook. It happened to me, and now I’ve become an addict to try almost every notebook for Bullet Journalism on the market.
Now, let’s talk about how much you need to spend to get a good quality notebook. Well, it can go from a few dollars to up to $ 50 or a little more!
Three or four years ago, when I was looking for a way to get organized and do more in less time with better results, I started to work with a personal planner!
I could get everything I need in one notebook already printed to get organized!
But soon I realized I’m a creative person and I need some white space on every page to add some doodles and some color, or some ideas on my own.
That moment I switched from a personal planner to a couple Bullet Journals with white paper sheets, and that is how my own Bullet Journal was born, simple, not expensive and versatile, I can add on it anything I want to.
Today, I’m going to share with you how I work to make my own Bullet Journal and it doesn’t cost me a lot of money at all!
Materials you will need:
- White paper for a printer.
- Three to five binder rings.
- Tabs – Post-it
- Hole puncher
- Fiskars paper cutter
========> Check the price on Amazon of A5 Refill Paper for Bullet Journal
How to make your own Bullet Journal.
Instructions are easy to follow, all you need to do is to get a few paper sheets and fold each one in half, place each paper on the Fiskars paper cutter, and cut each paper sheet in half.
2 – Set up your hole puncher to make the holes on the paper, you can punch the holes on two paper sheets at the same time, I won’t recommend doing more than some hole punchers will not last long if you do this.
3 – When you have enough papers with holes, place the rings on them and you’ll get your new Bullet Journal ready to start working on it.
How to make a Fancy Bullet Journal.
You might need four different type of paper:
- White paper
- Grid paper
- Lined paper
- Dotted paper
If you want to get some of these different type of paper for your new Bullet Journal, you can find different website where you can download a PDF and print them out as many times as you want to.
I have one dotted paper at hand and I print it out as many times as I need when I work on a new spread.
I love to have a few paper sheets already printed with the four different styles, this way when I want to work on a new spread, all I need to do is to take the paper I need and I can work on it.
I have designed a few spreads I know, I’ll use them often on Corel Draw and I print out a few of them to add them on my Bullet Journal.
Most of the spreads I have ready to be printed out to save some time are:
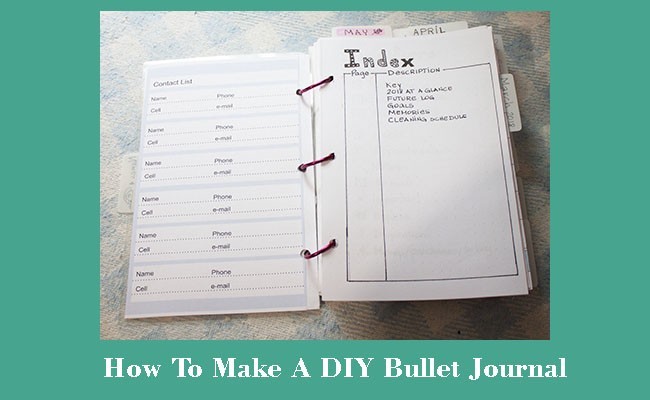
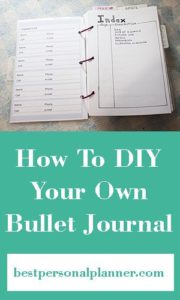
- Contact list – To add some names, phone numbers and e-mails.
- Month Calendar with no dates.
- Weekly spread with notes and to do list.
- Weekly plan – Food and exercise.
- Habit tracker.
I love to add some white paper on my Bullet Journal to write some notes or whenever I get creative and I want to start sketching or drawing.
DIY Bullet Journal Pros:
- It’s not expensive at all
- I can choose what kind of paper I want to have on it.
- It’s light and easy to carry.
- It lays wide open to work on it.
- I can get creative and design the cover
- I can add as many paper sheets as I need to.
- Whenever it gets too heavy I can take off some paper sheets from it and keep them at home.
- I add the paper sheets I’ll be working on into it, no need to keep everything on it.
What Spreads You Should Add To Your DIY Bullet Journal?
As you work on it, you’ll get to know what spreads you’ll be using on each month.
Not all the months will be the same as you can be planning different activities during that current month.
Some spreads will be the same month after month like:
- Month calendar
- Weekly spread
- Habit Tracker
- 30 Days of Gratitude
- Monthly Future Log
- Mood Tracker – a FREE Printable to draw a face with your mood during each day.
- Weight Loss Tracker
DIY Bullet Journal Cons:
- Printer paper is not the best quality, I find the quality of paper from some nice Bullet Journal much better!
Closing:
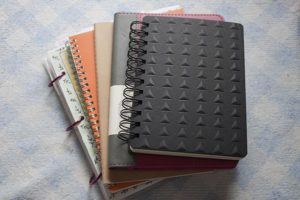
When you get use to work with a Bullet Journal, you might end like me having not just one but a few of them!
I find having a few of them allows me to keep more organized, some of my journals are meant for different topics. I like to keep one at home to have my favorite recipes and some notes about them, it won’t be a good idea to keep my recipes in my bullet journal to organize my time and work.
If you like to get inspired and start to work on your spirituality, you might need an extra notebook for it, it’s good to have some inspirational quotes on your regular Bullet Journal, but if you want to work deeper on spirituality you might want to keep it at home.
 Those two examples above from two different topics to work on a Bullet Journal will give you the example on why you might end with more than one notebook to work on, I like my own DIY Bullet Journal just because it allows me to add some paper to work on different topics, later I can take them out and keep them organized according to the topics.
So now you know, making your own Bullet Journal is not expensive and it’s so versatile, add to it as many paper sheets as you want to or keep it light and small to carry with you all the time.
Pick one of more topics to work on it.
The best of the Bullet Journal is that it will help you to get organized and creative!!!
Do you have a favorite Notebook as your Bullet Journal or would you give a try to a new one made by you?